Showing posts with label ipad tips. Show all posts

Create a calendar event or contact directly from email

Create an iPhone event directly from email iPhone/iPad tip: Create a calendar event or contact directly from emailAn invite to a can’t-miss event just landed in your inbox, and you want to mark it in your iPhone’s calendar before you forget—and while you’re at it, you’d like to add the sender’s name to your address book.
Well, good news: you’re just a few taps away from saving the date in your iPhone’s (or iPad’s) Calendar app, or from creating a new entry in your Contacts app—all directly from the original email message.
Here’s how…

Create a calendar event from email

  • Open the email, look for the date and time (which should already be highlighted in blue by your iPhone), tap it, then tap the “Create Event” button from the slide-up window. Once you do, an “Add Event” window will appear with the salient details already filled in.
  • iPhone Add Event screen 249x300 iPhone/iPad tip: Create a calendar event or contact directly from email
    Once you tap the “Create Event” button, an “Add Event” screen will appear with the salient details already filled in.

  • Go ahead and edit the new event or add more information (such as a location or a reminder), then tap the “Done” button. You’re all set!
  • You can also tap “Show in Calendar” to see if you’re free during that time slot, or “Copy” to copy the date and time to the iPhone’s virtual clipboard.

Create a contact

  • Go to the top of the email, tap the name you’d like to save in the “From:” field, and then tap the “Create New Contact” button.
  • A new contact form will appear with the name and email fields completed. Edit or add more details as you see fit, then tap the “Done” button.
Create a calendar event or contact directly from email

How to completely turn off an app’s notifications

How to completely turn off iPhone notifications iPhone/iPad tip: How to completely turn off an apps notificationsSo, you thought you turned off the notifications for an iPhone or iPad app, but it’s still bugging you with unwanted banners, beeps and badges. What gives?
Well, just because you switched an app’s “Alert style” setting to “none” doesn’t mean you’ve turned off all of its alerts.
There are, in fact, a few more notification settings that need tweaking—and if you don’t, expect more messages on your iPhone’s “lock” screen, red badges on your home screen, and blaring alert tones when you least expect them.
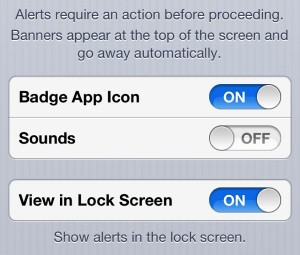
iPhone notification settings 300x255 iPhone/iPad tip: How to completely turn off an apps notifications
Make sure you don’t miss these options when tweaking your iPhone’s notification settings.
Read on for three notification settings that are easy to miss, starting with…

1. Lock-screen notifications

Even if you diligently turn off all the other alerts for a given app, the app may still flash alert banners on your iPhone’s (or iPad’s) “lock” screen from time to time.
Related tip: What’s the difference between an alert, a banner, and a badge?
Want to banish the banners for good?
  • Tap Settings, Notifications, then scroll down and tap the name of the offending app.
  • Scroll down again until you see the “View in Lock Screen” setting, and make sure it’s switched off.

2. Red app badges

Seeing lots of little red badges stuck to the apps on your iPhone’s home screen?
Those numbered alerts are there to notify you of…well, just about anything, from an unread email message to a nagging reminder that you haven’t played “Words With Friends” for a month.
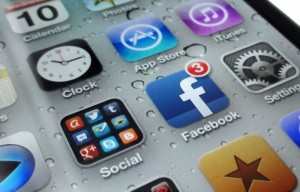
How to get rid of the red badges on your iPhone apps 300x192 iPhone/iPad tip: How to completely turn off an apps notifications
Had enough of these nagging little red badges? You can turn them off in just a few taps.

If there’s a specific red badge that’s driving you particularly batty, you can turn it off in just a few taps.
  • Again, tap Settings, Notifications, and tap the name of the app that’s flashing an unwanted badge.
  • Scroll down once more, then switch off the “Badge App Icon” setting.

3. Sound alerts

You set your iPhone to “silent” for an important company meeting, only to hear an embarrassingly loud “beep!” coming from your pocket right in the middle of your boss’s presentation. Ack!
Yep, the alert tones for some iPhone apps may still sound off even when your handset’s ringer switch is off. Annoying, right?
To shush an app’s alert tones, just…
  • You guessed it—head back to the iPhone’s Notifications settings (Settings, Notifications) and tap the app you want to silence.
  • Scroll down until you get to the “Sound” setting and switch it off—or, if there’s a choice of alert tones, make sure it’s set to “None.”

Bonus tip

You can temporarily silence all iPhone notifications and calls by turning on the “Do Not Disturb” mode.
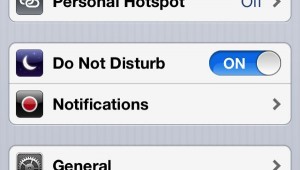
iOS Do Not Disturb mode 300x170 iPhone/iPad tip: How to completely turn off an apps notifications
You can get a temporary break from iPhone notifications thanks to the “Do Not Disturb” setting.

Tap Settings, then flip the switch next to “Do Not Disturb,” or tap Settings, Notifications, Do Not Disturb to schedule a daily quiet period.
Keep in mind, though, that Do Not Disturb will only block notifications while your iPhone is locked—and don’t forget to switch it back off when you’re ready to get calls again.
source http://heresthethingblog.com
How to completely turn off an app’s notifications

How to Erase All Your Personal Content from an iPhone or iPad

Do you have an older iPhone or iPad that you want to sell or give to someone and you want to remove all your personal data and apps? Or maybe your device has gotten clogged up after a lot of use and you just want to restore it back to its pristine factory condition. The procedure is quite straightforward and here is how it works.
  1. Open “Settings”
  2. Tap “General”
  3. Scroll to “Reset” and tap it
  4. A list of possible actions will be shown, as illustrated in the figure below
  5. To return the device to its original factory condition, tap “Erase All Content and Settings”
Resetting iOS devices
The process goes pretty quickly and then you will have a clean system with all your personal data and apps removed, including your Apple ID. Next time the device is turned on it will go through a first-time setup just as if it were new.
How to Erase All Your Personal Content from an iPhone or iPad

How to split the iPad keyboard in two

How to split the iPad keyboard iPad tip: How to split the keyboard in twoEver tried typing on your iPad’s keyboard with your thumbs while holding the iPad in your hands? Talk about awkward.
Well, there’s an easy way to make the iPad’s keyboard a lot more thumb-friendly: by splitting it in two.
A simple gesture is all it takes, provided you’ve got a key (no pun intended) setting enabled.
Here’s how…

  • Tap Settings, then tap General, scroll down the page a bit, and then tap Keyboard. Scroll down to the “Split Keyboard” setting and make sure it’s set to “On.”
  • Press the Home key, then pull up the iPad keyboard in any app you wish (such as, say, Safari).
  • Now, tap and hold the keyboard with two fingers—one on each side of the keyboard—and spread your fingertips apart. As you do, the keyboard will split in half.
  • Want to make the keyboard whole again? Just tap and hold each half of the keyboard with two fingers and push them back together.
Originally here

How to shrink a photo before sending it via email

Shrink an iPad photo before sending it via email iPad tip: How to shrink a photo before sending it via emailSandra writes: I sent a photo from my iPad to my Virgin email. The photo came out very large even though it was a JPEG. Could you please advise what I can do [to make it smaller]? The iPad is an iPad 3.
Hi Sandra! I must admit, I was a little puzzled when I first read your question.
After all, doesn’t the iPad automatically ask you whether you’d like to shrink a large, about-to-be-emailed photo, just like the iPhone does?
I gave it a try with my own iPad 3, and lo and behold: no pop-up asking if I really want to send a massive, multi-megabyte photo as an email attachment.
Instead, my iPad just pasted the full-size snapshot (1.3 megabytes, to be exact) into my email message and sent it, no questions asked.
Image Size settings for email on iPad 300x165 iPad tip: How to shrink a photo before sending it via email
Yes, you can shrink a photo before sending it via email on the iPad, provided you know where to tap.
So, what gives?
Well, it turns out you can reduce the size of a photo attachment before hitting the “Send” button, provided you know where to tap.
Here’s how…
  • First, let’s dive into the iPad’s Camera Roll in the Photos app, and find a great snapshot to send as an email attachment. Got one? Tap the Share button (it’s the one in the top-right corner of the screen, with a curved arrow), then tap the Mail icon.
  • Your iPad will automatically paste your photo (or photos, if you selected more than one) into a blank email message. Go ahead and fill in the “To:” and “Subject” lines, and add a message in the body of the email if you wish.
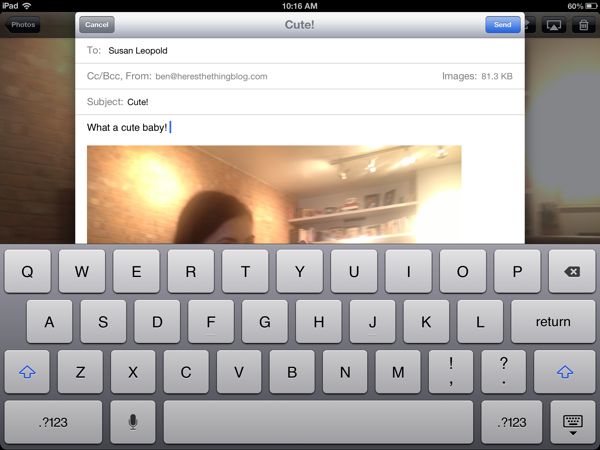
  • Now, here’s the trick: see the “CC/BCC” line, just below the “To” line? Look over to the right, and you’ll see a little text that reads “Images: 1.3 MB” (the size will vary depending on the image). Tap the “CC/BCC” line to expand it—and suddenly, you’ll see a series of four “Image Size” options: Small, Medium, Large, and Actual Size. Tap one of the buttons to shrink the photo down to size.
  • All set? Go ahead and tap the “Send” button.
How to shrink a photo before sending it via email