How to Print from Your Android Tablet or Smartphone


Smartphones and tablets are very handy but what if you want to print something? Maybe you’ve got a document or a picture that you want a copy of. What to do then? Printing from a mobile device is not as straightforward as from a standard PC but here is one method for Android platforms.
It uses a free service from Google called “Cloud Print”. You’ll need a Google account and a separate PC with a Chrome browser and an attached printer. You’ll also need a free app for your Android device.


First, configure the PC that has a printer attached.
  1. Open the Chrome browser.
  2. If not already signed in, sign in to your Google account by clicking the menu button in the far-right upper corner and then select “Sign in with Google.”
  3. After signing in, return to the Chrome menu page and click “Settings”.
  4. At the bottom of the Settings page, click “Show advanced settings”.
  5. Scroll down to the section “Google Cloud Print” and click the button “Add printers”.
  6. A confirmation page will open. Click “Add printer(s)”. Internet-enabled printers will not need this step.
  7. A Cloud Print web page will open where you can make further configurations of your printers, if desired.
  8. The Google Cloud Print section of the Chrome Advanced Settings page will now have two buttons, “Disconnect printers” and “Manage printers”. 
Next, set up the Android device that you want to print from.
  1. Download and install one of the free Cloud Print apps. I tried the newly released Google Cloud Print app. 
  2. Open the Cloud Print app and it should show the printer(s) that you set up on your PC.
You should now be able to print from any apps that allow sharing. The PC and/or the printer do not have to be on when you want to send a print command. The print job will be queued at Google Cloud Print until you turn the PC and printer on. You can check what print jobs are waiting by clicking the Chrome “Manage printers” button mentioned above in step 8. If you do not want your printer to always be connected to the Internet, simply click the "Disconnect printers" button imentioned in step 8 above.
How to Print from Your Android Tablet or Smartphone

Top 5: Free Android Texting Apps

If you're still paying for texting, you might want to sit down, because we have some news for you. Instant messaging apps are slowly taking over and replacing SMS messaging on smartphones. Free and usually easy to navigate, users are making the switch to save money on text messaging rates and text their friends overseas. Some of these apps are cross-platform, and others have a group-messaging feature, encryption, and much more. So we've decided to round up the top five texting apps available for Android.
Skype
5. Skype
Free Although it's not the best communication app for Android, Skype is definitely useful for keeping in touch with certain people like long-distance relatives or friends. Users can place free voice and video calls and also send instant messages to other Skype users on almost any device. When placing a video call, you can switch between your front and rear facing camera. Now with a revamped interface, Skype has a whole new look and a few new features, such as sending video messages to offline users.
Google Voice for Android
4. Google Voice
FreeGoogle Voice offers low-cost international voice calls and unlimited free text messages for your unique Google Voice number. The app also includes group messaging, offline voicemail, and conference calling. Users have the option to read transcripts of their voicemail (though this depends on the quality of the call, making it a far from perfect feature) and record their incoming calls. One thing to keep in mind is that when placing domestic or international calls, Google Voice for Android will use minutes from your cell phone plan, so watch out.

TextSecure
3.TextSecure
FreeAre you paranoid about your texts being seen or accessed by someone other than the recipient? If you are, then this is the app for you. TextSecure has you create a password upon startup and then proceeds to enter your existing SMS and MMS messages into an encrypted database. You can also send secure texts from the built-in messenger app or participate in a group chat. One downside is that the text is only encrypted when the recipient is also using TextSecure. On the up side, the settings on this app are pretty powerful, giving the user a range of options. The app itself isn't perfect, but it is certainly a viable option for someone who is looking for a decent secure texting app.

WhatsApp
2.WhatsApp
FreeOf all the texting applications available, WhatsApp probably has the largest user base. It supports Android, iOS, Symbian, Blackberry, and Windows Phone smartphones. Feature-wise, it has a few more customization options than your standard text-messaging service: multimedia messages, inserting emoticons, and changing the conversation's wallpaper are among its abilities. Another awesome feature is the group messaging with titles you can edit. What makes WhatsApp better than regular texting is the ability to leave the conversation to avoid pesky notifications after you've had your say. Unless you're satisfied with your existing instant messaging app, then you'll definitely want to try this one out.

Viber
1.Viber
Free This VoIP app aims to improve users' talk and text experience with some impressive features like OS integration, group chatting with up to 40 people, no ads, and push notifications even when the app is off. You can save money in the process when you send free calls and text messages to other people who use Viber (though it only applies when you're on a WiFi network). Users also have the ability to transfer their conversation (voice or text) to their desktop provided they have the Viber software installed. The app itself is well-designed and if you're looking to save money in voice calls (especially to other countries), Viber might be what you're looking for.

Source pcmag.com
Top 5: Free Android Texting Apps

How To Decorate your inbox with custom photo backgrounds

Decorate your Gmail inbox with custom photo backgrounds Gmail tip: Decorate your inbox with custom photo backgrounds
Tired of Gmail’s boring blank wallpaper? Think the built-in Gmail themes are a bit too cheesy? If so, you’re in for a treat.
Buried in the list of color, HD, and “classic” Gmail themes is a pair of customizable themes that let you upload your own images—perfect for decorating your Gmail inbox with vacation photos, art shots, baby pictures, you name it.
Gmail Themes option Gmail tip: Decorate your inbox with custom photo backgrounds
Click the gear icon and select “Themes” to get started with your own custom Gmail background.

You can upload photos from your desktop, your Google+ account, your Android or iOS device (assuming you have the Google+ social app installed), or you can even plug in the URL or a photo from the web.
Here’s how…
  • Open Gmail, click the gear icon in the top-right corner of the screen, then select Themes.
  • Scroll down to the Custom Themes section and click either “Light” (for a lighter-looking Gmail inbox) or “Dark” (for a slightly darker inbox). Don’t stress about which one to pick; you can easily change your mind later.
  • As soon as you click, a pop-up window titled “Select your background image” will appear. Click “Upload photos” in the left column to upload an image from your desktop, or click “My photos” to select pictures from your Google+ profile. You can also click “Paste a URL” to grab an image from the web, or “Photos from phone” if you have the mobile Google+ app installed with “Instant Upload” turned on.
  • Gmail custom themes Gmail tip: Decorate your inbox with custom photo backgrounds
    You can upload your own Gmail background images by selecting either the “Light” or “Dark” custom theme.

  • That’s it! Within a second or so, the image you selected will become the background for your Gmail inbox.
  • To change your custom background, go back to the Themes setting and click “Change your background image” under the “Custom Themes” heading.
  • You can also switch your custom theme from “Light” to “Dark” by clicking the appropriate icons—and no, you won’t have to upload your photo again if you do so.

Bonus tip

Want to delete an image you uploaded for your Gmail background? Just go to your Google+ profile (click your name in the top-right corner of the main Google page), move your mouse over the Home icon, click Photos, click the photo you uploaded, then click the Trash icon near the top of the page.
Source http://heresthethingblog.com
How To Decorate your inbox with custom photo backgrounds

How to create a new photo album

How to create a new photo album on an iPhone iPad/iPhone tip: How to create a new photo album (updated)Want to organize the pile of snapshots sitting in your iPhone’s camera roll? Try this: just create a new album or two, then start sorting.
There are actually a couple of ways to make a photo album on your iPhone or iPad: one is to create a new, empty album and then start adding photos to it, while the other is to select one or more images first and then create a new album.
Add iPhone photos to a new album 300x250 iPad/iPhone tip: How to create a new photo album (updated)
Just tap the photos you want to add to a new album, then tap the “Add To” button.

Here’s how to get started…
  • Let’s begin by selecting some photos and adding them into a new album. Tap the Photos icon from your iPhone’s or iPad’s home screen, tap the Albums tab, select Camera Roll, then tap the Edit button.
  • Now, it’s time to pick some photos. Tap a few—as many as you like—then press the “Add To” button at the bottom (on an iPhone) or top (on an iPad) of the screen.
  • Next, an “Add to New Album” button will appear. Go ahead and tap it, then type a name for your album in the pop-up window. If you’ve already created some new photos albums on your iPhone/iPad, you’ll see an “Add to Existing Album” button in addition to “Add to New Album.”
  • Finally, tap the “Save” button, and voilĂ —your new photo album will appear at the bottom of the Album list.
Want to create a new album first and then start adding photos to it? No problem.
  • From the Album screen, tap the “+” button sitting on the top-left corner of the screen.
  • Name your new photo album and tap “Save.”
  • If you’re using an iPad, you’ll next see a screen of images from your Camera Roll; tap to select photos to add to your new album, then tap the Done button when you’re finished.
  • On an iPhone, tap a photo album from the list that appears, then start tapping photos to add to your new album. You can also pick and choose from your Photo Stream by tapping the Photo Stream tab at the bottom of the screen.

Bonus tip

You can rearrange or delete photo albums on the iPhone by tapping the Edit button on the Albums screen. On the iPad, just tap, hold, and drag a photo album to rearrange it, or tap the Edit button and tap the little “x” on an album to delete it.
Oh, and one more thing: Keep in mind that you can delete an album without trashing the photos inside it.
Source http://heresthethingblog.com
How to create a new photo album

How to clear the saved searches in your “Web History”

How to turn off your Google Web history Google tip: How to clear the saved searches in your Web History
Here’s a question for you: When you search on Google, are you also signed in to Google? If so, there’s a good chance Google is saving a so-called “Web History” of each and every one of your searches, stretching back for months or even years.
I checked my own Google account and found that Google has saved nearly 30,000 of my prior searches, plus a record of the links I clicked based on those search results, stretching as far back as 2006.
Delete individual Google Web History items Google tip: How to clear the saved searches in your Web History
Your Web History contains a comprehensive list or all your Google searches, potentially stretching back years—and yes, you can delete some or all of your searches.

Believe it or not, I can tell you that on December 29, 2007 at exactly 4:51 p.m., I did a Google search on “new years smith street brooklyn”—probably because I was hunting for a good place to spend New Year’s Eve.
In addition to the enormous list of searches, your Web History also boasts a color-coded calendar that shows which days of the week you’re doing the most searching.
And since your Google Web History is (of course) itself searchable, it makes for a handy (if, perhaps, a bit unsettling) way to find an interesting web page that’s since slipped your mind.
Now, don’t like the idea of Google saving your searches? Well, good news and bad news.
Good news first: not only can you stop Google from saving your searches in your Web History, you can also delete your Web History selectively or entirely.
The bad news? Zapping your Google web history doesn’t wipe out every last trace of your past Google searches.
Indeed, Google (like many other search engines) may share the search and usage data stored on its servers with various “partners,” advertisers, or even law enforcement. Food for thought, particularly in light of the recent PRISM controversy.
Turn off Google Web History button Google tip: How to clear the saved searches in your Web History
You can stop Google from saving searches in your Web History, but that doesn’t mean Google isn’t still keeping records of your search activity.

So, ready to check out your Web History? Let’s get started…
  • Sign in to your Google account, click your user icon in the top-right corner of the page, click Account, then scroll all the way down and click the “Manage your web history” link. You can also just click this link: history.google.com.
  • You should now be looking at your personal Web History as Google sees it—interesting stuff, actually. You can browse your history using the navigation links to the left (anything from “Web” and “Images” to “Shopping” and “Maps), or by clicking the calendar on the right. The days on the calendar are color-coded based on your search activity, with the darker-blue dates representing the days you searched the most often.
  • See anything in your Web History that you’d like to delete? If so, click the checkbox next to the item and click the “Remove items” button.
  • Want to delete everything in your Web History? Click the gear icon in the top-right corner of the page, select Settings, then click the “delete all” link.
  • Want Google to stop tracking your searches in your Web History? Go back to the Settings page, then click the “Turn off” button. (Yes, you can always come back later and turn your web history back on.)
Source http://heresthethingblog.com
How to clear the saved searches in your “Web History”
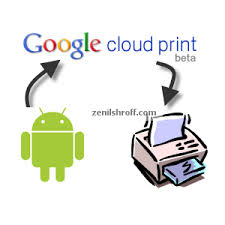
How to print directly from your phone


How to print directly from your Android phone Android tip: How to print directly from your phone
Got a photo, a web page, or a PDF form on your Android phone that you’d like to print? Nope, there’s no need to send the document to your PC or Mac—and no, you don’t need a newfangled, web-connected printer, either.
All you really need, in fact, is a) a standard USB printer connected to your desktop or laptop, b) Google’s Chrome web browser, and c) an Android app that works with Google’s handy (and free) “Cloud Print” service.
Google Cloud Print select printer Android 300x260 Android tip: How to print directly from your phone
Just select your Cloud Print-connected printer to start printing documents straight from your Android phone.

What is Cloud Print, you ask? Well, it pretty much is what it says: a feature that lets you print documents and photos from the web, your phone, or a tablet, all via the “cloud.”
There’s a decent range of Google Print-friendly printers and apps available, and Google just released its own, official Google Print app for Android devices.
And while you can get a fancy Google Print-enabled printer that prints documents directly from the web, there’s nothing stopping you from using Google Print with the garden-variety printer you’re using right now.
Want to give it a try? Let’s get started…
  • First, you’ll need to have Google Chrome installed on the PC or Mac that your printer’s connected to. Once that’s done, sync your Google account with Chrome by clicking the menu button in the top-right corner of the browser and selecting “Sign in with Google.”
  • All set? Click the menu button again, select Settings, click “Show advanced settings” at the bottom of the page, then click the “Sign in to Google Cloud Print” button beneath the “Google Cloud Print” heading. Once you’ve signed in to Cloud Print with your Google ID, you can add your printer to your Cloud Print profile.
  • Google Cloud Print share screen 300x217 Android tip: How to print directly from your phone
    Cloud Print will let you print from any Android app with a Share option.

  • Next, you’ll need to install a Cloud Print-compatible app onto your Android phone. For this example, I’ll go with Google’s official Cloud Print app, just to keep things simple. Also, when you’re setting up your Cloud Print app, make sure to sign in to Cloud Print using the same Google ID you used when setting up Cloud Print in Chrome.
  • Done? If so, let’s try it. First, make sure both your PC and printer are turned on, then launch the Chrome web browser.
  • Open a web page on your Android phone’s browser, tap the three-dot menu button in the top corner of the screen, tap Share, then tap the Cloud Print icon. (You can also print by tapping “Share” from within any Android app.)
  • The Google Cloud Print app (or the Cloud Print app of your choice) should now open. Tap your printer from the list of available Cloud Print printers, take a quick look at the print preview screen, then tap the Print button (it’s the one that looks like an arrow, near the top of the screen). If all goes well, your printer should begin cranking out pages within a minute or so.
Source http://heresthethingblog.com
How to print directly from your phone