How to swipe instead of type in keypad

Android type with a swipe gesture typing Android tip: Hate typing on the keypad? Try swiping insteadNever quite got the hang of tap, tap, tapping on a touchscreen keypad? If you’re using an Android phone and you’re feeling a little daring, there’s a clever—and surprisingly elegant—alternative: swiping.
For a little more than a year now, Android has boasted a clever feature called Gesture Typing, which lets you type on your phone’s virtual keyboard by swiping your fingertip from one letter to another.
Android Gesture Typing settings 297x300 Android tip: Hate typing on the keypad? Try swiping instead
You can enable Gesture Typing from the Language & Input section of the Settings app.
As you slide your finger, Gesture Typing does its best to guess the word you want to type—and luckily, Gesture Typing’s best guess is typically quite good.
Of course, typing with touchscreen gestures takes some getting used to, but it doesn’t take long to get the hang of it—and don’t be surprised if you never go back to tapping.
Indeed, within a few minutes, I found myself “typing” with ease, with my thumb making big, looping gestures across the virtual keypad on my (now long-in-the-tooth) Galaxy Nexus phone.
Gesture Typing is “natively” supported on Android phones running on Android version 4.2 and up. (Here’s how to check which version of Android your phone is running on.)
Got an older Android phone? You can still add Gesture Typing to your device by downloading and installing Google Keyboard (which works on Android phones with version 4.0 and up of the Android OS) from the Play Store.
Want to give Gesture Typing a try? Here’s how…
  • Launch the Settings app, tap “Language & input,” then find the “Keyboard & Input Methods” heading.
  • Make sure the Google Keyboard option is checked, then tap its settings button immediately to the right.
  • Scroll down to the Gesture Typing section, then check the box next to “Enable gesture typing.” You can also tick off a few other options if you wish, including a “gesture trail” that appears as you swipe, as well as a “floating” preview of the word that Gesture Typing thinks you have in mind.
  • Now, go ahead and jump to any app that requires the keyboard, and try swiping instead of typing. Neat, right?
An alternative to Gesture Typing is Swype, a third-party Android app that’s actually been in the swipe-to-type business longer than Google has.
Swype comes with a variety of features you won’t find in Google’s Keyboard app, from gesture shortcuts (which let you, say, jump to the number keypad by using a special swipe) to custom keyboard themes. You can even tweak how much of the screen the Swype keyboard fills.
The only catch: the Swype app (which is available from the Play Store) will set you back $4, while Google Keyboard is free.

Bonus tip

Don’t bother to tap the space bar as you’re swiping; both Gesture Typing and Swype will add spaces between your words automatically.

via

How to Hide the “Newsstand” app in a folder (finally!) in iOS7

How to hide Newsstand in a folder in iOS 7 iOS 7 tip: Hide the Newsstand app in a folder (finally!)The much-maligned “Newsstand”—you know, the home for various magazines and newspapers sold through Apple’s App Store—is a bit like a party crasher who plunks down on your sofa and refuses to budge.
Debuting on the home screens of iPhone and iPad more than two years ago, the Newsstand app (which, in the pre-iOS 7 days, used to look like a wooden cabinet stuffed with bookshelves) couldn’t be deleted, nor could it be tucked neatly into another folder.
Instead, it was just…well, there, whether you actually used it or not.
Moving the Newsstand app into a folder in iOS 7 300x210 iOS 7 tip: Hide the Newsstand app in a folder (finally!)
Thanks to iOS 7, you can now hide the Newsstand app in a home-screen app folder.
Well, here’s a small-but-important change that Apple apparently made with iOS 7: starting now, you can hide the Newsstand app in another folder.
No, you still can’t delete the Newsstand app altogether, but hiding it in a rarely used folder is almost as good.
Here’s how…
  • Just tap and hold the Newsstand app (in iOS 7, it’s white with little magazine and newspaper images inside); after a second or so, all the apps on your home screen should start doing a little dance.
  • Next, either a) drag the Newsstand icon into an existing home-page folder, or b) drag the icon on top of another icon to create a new folder.
  • All set? Tap the Home key to save your changes and make all your app icons stop shaking.
Via http://heresthethingblog.com
How to Set an “out of office” message with the Gmail app

Set an out of office message from the Gmail for Android app Android tip: Set an out of office message with the Gmail app 
So, your bags are packed, you’re in the airport and you’re about to step on a plane heading for someplace warm, and then it hits you: you forgot to activate an “out of office” message for your email account.
Well, if you’re using Gmail, good news: Gmail for Android just added an auto-responder feature that lets you set up an “out of office” message directly from your Android phone, no PC or Mac required.
Gmail for Android vacation responder settings 300x204 Android tip: Set an out of office message with the Gmail app
You can now set an out of office message directly from the (updated) Gmail for Android app.
Here’s how…
  • First, you’ll need to install the latest version of the Gmail app. Launch the Play Store app, open the sidebar (tap in the top-left corner of the screen) and navigate to the “My apps” section, then tap the green Update All button to install any pending app updates, including (potentially) Gmail.
  • Next, launch Gmail, tap the three-dot menu button in the top-right corner of your screen, tap Settings, then tap the Gmail account for which you’d like to set up an “out of office” message.
  • Tap “Vacation responder,” then enter a starting date, and end date, a subject line (“Gone fishing!”), and a message for anyone who tries to email you during your well deserved break. You can also check the box next to “Send only to my Contacts” if you only want your family, friends and colleagues to know you’re away.
  • Flip on the switch next to “Vacation responder,” tap the Done button, then sit back and relax. 
Via http://heresthethingblog.com

How To Play YouTube Videos In The Background On iOS 7

Some might remember a time when YouTube was an built-in app on iOS devices – you could play YouTube videos in the background, thereby allowing you to use other apps (or turn the screen off) while still being able to listen to the audio of the YouTube clips.
YouTube Background
Then iOS 6 came along and YouTube was removed and became an app in the iTunes App Store – as a result, the background playback feature was also removed. On iOS 7, however, there is actually a simple workaround, and that’s exactly what we’ll be showing you in this quick tutorial today.

Play YouTube In The Background On iOS 7

Instead of using the YouTube app, use Safari and navigate to any YouTube clip and hit the Play button.
Safari YouTube
Now, if you want to use other apps while having the YouTube video play in the background, just tap on the Home button to go to your homescreen.
When you’re on your homescreen, swipe up to launch the Control Center and tap on the Play/Pause button. You’ll now be able to listen to the audio of that YouTube video you selected earlier and use other apps at the same time.
YouTube Control
You can also tap on your device’s power button to turn off the screen and still listen to the audio of that YouTube clip.

Via hongkiat

8 new iOS 7 features that are worth the update

The latest version of iOS (the software that powers the iPhone, iPad, and iPod Touch) will be available for free starting September 18, and Apple is busy crowing about such features as camera filters, iTunes Radio, and—biggest of all—its radical new design.
Buried beneath the hoopla, though, is a series of handy features and enhancements that many of us will keep on using long after the thrill (or not) of sepia-tinged camera filters and free streaming music has worn off.
Read on for 8 new features that’ll make you glad you installed (eventually, anyway) iOS 7, starting with…
Note: I’ll be posting tutorials for most of the following features once Apple makes iOS 7 available for download.

1. Call and message blocking

At last, you’ll be able to block annoying callers and text messages (particularly annoying group message threads) directly from your iPhone, no third-party app required. (Source)

2. FaceTime voice calls

Love the crystal-clear audio quality of FaceTime video chat, but don’t feel the need to actually see the person you’re talking to? With the arrival of iOS 7, FaceTime will let you make audio-only calls, perfect for making distortion-free voice calls without worrying how your hair looks.

3. Apps will update automatically

Begone, red badge on the App Store icon. With iOS 7, all your apps will update silently and automatically, no tapping required. Hallelujah. (Source)

4. Bigger app folders

Up until now, app folders on the iPhone home screen have been restricted to just nine apps. Once you install iOS 7, though, app folders will be able to contain more than 100 apps, which you can swipe though with your fingertips.

5. Do Not Disturb will silence your iPhone/iPad while you’re using it

The “Do Not Disturb” mode that made its debut with last year’s iOS 6 update would only silence incoming calls, alerts and notifications when your iOS device was locked. The iOS 7 version of Do Not Disturb, however, gives you the option of muzzling calls and notifications even when your iPhone or iPad is unlocked and in use, perfect for watching movies, playing Candy Crush, or reading a Kindle book without annoying banners or buzzes whenever a text message arrives. (Source)

6. Activation lock

Here’s an clever iOS 7 feature that’ll make thieves think twice before swiping your iPhone. Once you enable “Activation Lock,” your lost iPhone will required your iCloud password before it can be reactivated—essentially turning your handset into a paperweight if it falls into the wrong hands.

7. Find out which apps are the biggest data hogs

At last, iOS 7 will let you find out which apps are taking the biggest chunk out of your monthly mobile data allowance, and you’ll even be able to shut off cellular data use for specific apps. Long overdue. (Source)

8. Turn the camera flash into a flashlight, anytime

Sure, the Apple App Store is already littered with flashlight apps, but none that’ll let you turn the camera flash into a flashlight directly from the iPhone lock screen. Enter iOS 7′s Control Center, which lets you pull up a panel of controls—everything from Airplane mode and Bluetooth to screen brightness and, yes, a flashlight button—by swiping up from the bottom of the display, even from the lock screen.
iOS 7 for iPhone is slated to arrive September 18, and you’ll be able to update your device by tapping Settings, System Update.

Repost from http://heresthethingblog.com/2013/09/10/ios-7-tip-8-features-worth-update
8 new iOS 7 features that are worth the update

Turn on “airplane mode” and Wi-Fi at the same time


Turn on Airplane Mode and Wi Fi at the same time Android/iPhone tip: Turn on airplane mode and Wi Fi at the same timeCarol writes: This may be more of a data/application question than a tech question, but here goes: Son is in Japan with his Droid Razr Maxx, trying to navigate around roaming and international charges—ouch!
Can’t get a straight answer from our carrier (Verizon); of course, they want us to sign up for international calling and data.
If he leaves his phone in “airplane mode” during the day—to take pictures, mainly—but turns on Wi-Fi in a free hotspot at night, will he be able to upload photos free of charge to Facebook or email (for example)?
We are using Viber for calling/texting, and Skype for online chatting. I am such a technosaur… :/
Hi Carol! Actually, you don’t sound like a technosaur at all. You already know about overseas data and calling networks (and that “roaming” on them costs a fortune), you’re savvy about “airplane mode” (which switches off all of your smartphone’s antennas and wireless transmitters), and you’ve figured out how to save on SMS and phone charges with free chat apps like Skype and Viber.
Not too shabby, if you ask me.
Android Wi Fi settings 300x251 Android/iPhone tip: Turn on airplane mode and Wi Fi at the same time
There’s nothing stopping you from turning Wi-Fi back on after activating “airplane mode.”
Anyway, yes—your son absolutely can upload photos to Facebook over free Wi-Fi hotspots in Japan, or anywhere abroad.
Wi-Fi hotspots have nothing to do with cellular voice or data networks (although some cellular carriers, like AT&T, offer Wi-Fi hotspots that subscribers can use), and as long as your son’s phone is set to “airplane mode,” there’s no chance he’ll run up massive mobile charges by accidentally roaming on a Japanese cellular network.
And here’s a tip: both Android phones (like the Droid Razr Maxx) and iPhones will let you turn on both Wi-Fi and “airplane mode” at the same time, meaning there’s no need to repeatedly switch “airplane mode” off and on to connect to a nearby Wi-Fi hotspot.
Here’s how…

For Android phones:

  • Tap Settings, then tap More under the “Wireless & Networks” setting.
  • Tap the “Airplane mode” checkbox (when you do, you should see a little airplane icon in the top corner of the screen), then tap Back.
  • Flip the switch next to Wi-Fi back on, then make sure you still see the airplane-mode icon at the top of the screen.
iPhone Airplane Mode settings 300x248 Android/iPhone tip: Turn on airplane mode and Wi Fi at the same time
You can also turn on both Wi-Fi and “airplane mode” on an iPhone.
(Note: the instructions above may vary depending on the make and model of your Android phone.)

For iPhone:

  • Tap Settings, then switch Airplane Mode to “On.”
  • Tap Wi-Fi, tap the switch to turn Wi-Fi back on, then connect to any nearby network. Again, you should still see the airplane-mode icon at the top of the screen.

Your “Instant Queue” just turned into “My List” in Netflix

Netflix My List feature Netflix tip: Your Instant Queue just turned into My List
Can’t find your “queue” of saved movies and TV shows on Netflix.com? You’re not the only one. Just the other day, I went nuts trying to find my missing queue on the Netflix website.


Well, turns out that our Netflix queues have quietly morphed into a new feature called “My List,” which is slated to roll out to all Netflix users over the next couple of weeks.
Don’t know what a Netflix “instant queue” is—or was? Well, it’s actually an artifact of Netflix’s old DVD-by-mail service, which only lets you keep a limited number of DVDs (anywhere from one to 8 or so, depending on your subscription plan) at home.

Of course, when it comes to Netflix’s library of on-demand instant videos, you don’t necessarily need an ordered “queue.” A saved “list” of bookmarked, want-to-watch videos seems like a better fit … hence the name change, I’m guessing.
Netflix order My List manually 300x146 Netflix tip: Your Instant Queue just turned into My List
Don’t want your saved My List videos ordered automatically? You can reorder your list manually by changing a single setting.

Anyway, if you visit Netflix.com now, you’ll probably see a new “Your List” row near the top of your page, populated by any movies or TV shows that you’ve previously saved to your old Netflix queue.
Move your mouse over the arrows flanking the “Your List” row to scroll back and forth. You can also add or remove videos from the list by clicking the “Add to/Remove from List” button from a video description page or pop-up.

OK, but what about ordering your queue—er, list? Well, Netflix says it can now sort your list automatically, “presenting you with the titles you’re most likely to want to watch right up front.”
All well and good, but there’s also an option to sort your list manually. Just click the “My Account” link at the top of the page, then click the “Order in My List” link. You can also click the “See All” link next to Your List on the Netflix.com home page, then click the “Change order to:” button.
Also, keep in mind that the Netflix mobile apps still show a row of “Instant Queue” videos, but I’m guessing it’ll turn into My List in a future app update.


Note: Since Netflix appears to be rolling out My List slowly, you may see only some (or even none) of the new My List features in your account quite yet.
Your “Instant Queue” just turned into “My List” in Netflix

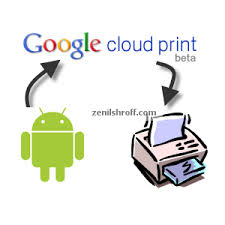
How to Print from Your Android Tablet or Smartphone


Smartphones and tablets are very handy but what if you want to print something? Maybe you’ve got a document or a picture that you want a copy of. What to do then? Printing from a mobile device is not as straightforward as from a standard PC but here is one method for Android platforms.
It uses a free service from Google called “Cloud Print”. You’ll need a Google account and a separate PC with a Chrome browser and an attached printer. You’ll also need a free app for your Android device.


First, configure the PC that has a printer attached.
  1. Open the Chrome browser.
  2. If not already signed in, sign in to your Google account by clicking the menu button in the far-right upper corner and then select “Sign in with Google.”
  3. After signing in, return to the Chrome menu page and click “Settings”.
  4. At the bottom of the Settings page, click “Show advanced settings”.
  5. Scroll down to the section “Google Cloud Print” and click the button “Add printers”.
  6. A confirmation page will open. Click “Add printer(s)”. Internet-enabled printers will not need this step.
  7. A Cloud Print web page will open where you can make further configurations of your printers, if desired.
  8. The Google Cloud Print section of the Chrome Advanced Settings page will now have two buttons, “Disconnect printers” and “Manage printers”. 
Next, set up the Android device that you want to print from.
  1. Download and install one of the free Cloud Print apps. I tried the newly released Google Cloud Print app. 
  2. Open the Cloud Print app and it should show the printer(s) that you set up on your PC.
You should now be able to print from any apps that allow sharing. The PC and/or the printer do not have to be on when you want to send a print command. The print job will be queued at Google Cloud Print until you turn the PC and printer on. You can check what print jobs are waiting by clicking the Chrome “Manage printers” button mentioned above in step 8. If you do not want your printer to always be connected to the Internet, simply click the "Disconnect printers" button imentioned in step 8 above.
How to Print from Your Android Tablet or Smartphone

Top 5: Free Android Texting Apps

If you're still paying for texting, you might want to sit down, because we have some news for you. Instant messaging apps are slowly taking over and replacing SMS messaging on smartphones. Free and usually easy to navigate, users are making the switch to save money on text messaging rates and text their friends overseas. Some of these apps are cross-platform, and others have a group-messaging feature, encryption, and much more. So we've decided to round up the top five texting apps available for Android.
Skype
5. Skype
Free Although it's not the best communication app for Android, Skype is definitely useful for keeping in touch with certain people like long-distance relatives or friends. Users can place free voice and video calls and also send instant messages to other Skype users on almost any device. When placing a video call, you can switch between your front and rear facing camera. Now with a revamped interface, Skype has a whole new look and a few new features, such as sending video messages to offline users.
Google Voice for Android
4. Google Voice
FreeGoogle Voice offers low-cost international voice calls and unlimited free text messages for your unique Google Voice number. The app also includes group messaging, offline voicemail, and conference calling. Users have the option to read transcripts of their voicemail (though this depends on the quality of the call, making it a far from perfect feature) and record their incoming calls. One thing to keep in mind is that when placing domestic or international calls, Google Voice for Android will use minutes from your cell phone plan, so watch out.

TextSecure
3.TextSecure
FreeAre you paranoid about your texts being seen or accessed by someone other than the recipient? If you are, then this is the app for you. TextSecure has you create a password upon startup and then proceeds to enter your existing SMS and MMS messages into an encrypted database. You can also send secure texts from the built-in messenger app or participate in a group chat. One downside is that the text is only encrypted when the recipient is also using TextSecure. On the up side, the settings on this app are pretty powerful, giving the user a range of options. The app itself isn't perfect, but it is certainly a viable option for someone who is looking for a decent secure texting app.

WhatsApp
2.WhatsApp
FreeOf all the texting applications available, WhatsApp probably has the largest user base. It supports Android, iOS, Symbian, Blackberry, and Windows Phone smartphones. Feature-wise, it has a few more customization options than your standard text-messaging service: multimedia messages, inserting emoticons, and changing the conversation's wallpaper are among its abilities. Another awesome feature is the group messaging with titles you can edit. What makes WhatsApp better than regular texting is the ability to leave the conversation to avoid pesky notifications after you've had your say. Unless you're satisfied with your existing instant messaging app, then you'll definitely want to try this one out.

Viber
1.Viber
Free This VoIP app aims to improve users' talk and text experience with some impressive features like OS integration, group chatting with up to 40 people, no ads, and push notifications even when the app is off. You can save money in the process when you send free calls and text messages to other people who use Viber (though it only applies when you're on a WiFi network). Users also have the ability to transfer their conversation (voice or text) to their desktop provided they have the Viber software installed. The app itself is well-designed and if you're looking to save money in voice calls (especially to other countries), Viber might be what you're looking for.

Source pcmag.com
Top 5: Free Android Texting Apps

How To Decorate your inbox with custom photo backgrounds

Decorate your Gmail inbox with custom photo backgrounds Gmail tip: Decorate your inbox with custom photo backgrounds
Tired of Gmail’s boring blank wallpaper? Think the built-in Gmail themes are a bit too cheesy? If so, you’re in for a treat.
Buried in the list of color, HD, and “classic” Gmail themes is a pair of customizable themes that let you upload your own images—perfect for decorating your Gmail inbox with vacation photos, art shots, baby pictures, you name it.
Gmail Themes option Gmail tip: Decorate your inbox with custom photo backgrounds
Click the gear icon and select “Themes” to get started with your own custom Gmail background.

You can upload photos from your desktop, your Google+ account, your Android or iOS device (assuming you have the Google+ social app installed), or you can even plug in the URL or a photo from the web.
Here’s how…
  • Open Gmail, click the gear icon in the top-right corner of the screen, then select Themes.
  • Scroll down to the Custom Themes section and click either “Light” (for a lighter-looking Gmail inbox) or “Dark” (for a slightly darker inbox). Don’t stress about which one to pick; you can easily change your mind later.
  • As soon as you click, a pop-up window titled “Select your background image” will appear. Click “Upload photos” in the left column to upload an image from your desktop, or click “My photos” to select pictures from your Google+ profile. You can also click “Paste a URL” to grab an image from the web, or “Photos from phone” if you have the mobile Google+ app installed with “Instant Upload” turned on.
  • Gmail custom themes Gmail tip: Decorate your inbox with custom photo backgrounds
    You can upload your own Gmail background images by selecting either the “Light” or “Dark” custom theme.

  • That’s it! Within a second or so, the image you selected will become the background for your Gmail inbox.
  • To change your custom background, go back to the Themes setting and click “Change your background image” under the “Custom Themes” heading.
  • You can also switch your custom theme from “Light” to “Dark” by clicking the appropriate icons—and no, you won’t have to upload your photo again if you do so.

Bonus tip

Want to delete an image you uploaded for your Gmail background? Just go to your Google+ profile (click your name in the top-right corner of the main Google page), move your mouse over the Home icon, click Photos, click the photo you uploaded, then click the Trash icon near the top of the page.
Source http://heresthethingblog.com
How To Decorate your inbox with custom photo backgrounds

How to create a new photo album

How to create a new photo album on an iPhone iPad/iPhone tip: How to create a new photo album (updated)Want to organize the pile of snapshots sitting in your iPhone’s camera roll? Try this: just create a new album or two, then start sorting.
There are actually a couple of ways to make a photo album on your iPhone or iPad: one is to create a new, empty album and then start adding photos to it, while the other is to select one or more images first and then create a new album.
Add iPhone photos to a new album 300x250 iPad/iPhone tip: How to create a new photo album (updated)
Just tap the photos you want to add to a new album, then tap the “Add To” button.

Here’s how to get started…
  • Let’s begin by selecting some photos and adding them into a new album. Tap the Photos icon from your iPhone’s or iPad’s home screen, tap the Albums tab, select Camera Roll, then tap the Edit button.
  • Now, it’s time to pick some photos. Tap a few—as many as you like—then press the “Add To” button at the bottom (on an iPhone) or top (on an iPad) of the screen.
  • Next, an “Add to New Album” button will appear. Go ahead and tap it, then type a name for your album in the pop-up window. If you’ve already created some new photos albums on your iPhone/iPad, you’ll see an “Add to Existing Album” button in addition to “Add to New Album.”
  • Finally, tap the “Save” button, and voilĂ —your new photo album will appear at the bottom of the Album list.
Want to create a new album first and then start adding photos to it? No problem.
  • From the Album screen, tap the “+” button sitting on the top-left corner of the screen.
  • Name your new photo album and tap “Save.”
  • If you’re using an iPad, you’ll next see a screen of images from your Camera Roll; tap to select photos to add to your new album, then tap the Done button when you’re finished.
  • On an iPhone, tap a photo album from the list that appears, then start tapping photos to add to your new album. You can also pick and choose from your Photo Stream by tapping the Photo Stream tab at the bottom of the screen.

Bonus tip

You can rearrange or delete photo albums on the iPhone by tapping the Edit button on the Albums screen. On the iPad, just tap, hold, and drag a photo album to rearrange it, or tap the Edit button and tap the little “x” on an album to delete it.
Oh, and one more thing: Keep in mind that you can delete an album without trashing the photos inside it.
Source http://heresthethingblog.com
How to create a new photo album